
A Salesforce rollout can look finished in a demo and still fail on Monday morning. The sales team may see its new opportunity page, yet discover that old account owners are missing. Service agents may open cases, yet find that email replies never reach customers. A dashboard may load perfectly while counting the wrong deals. If you need hands-on help, HyphenX offers Salesforce consulting for teams in this position.
This is where a Salesforce implementation checklist matters most. The team has to prove that real people can finish real work, that the records are correct, and that someone knows what to do when something breaks. That takes more than a launch date on a project plan.
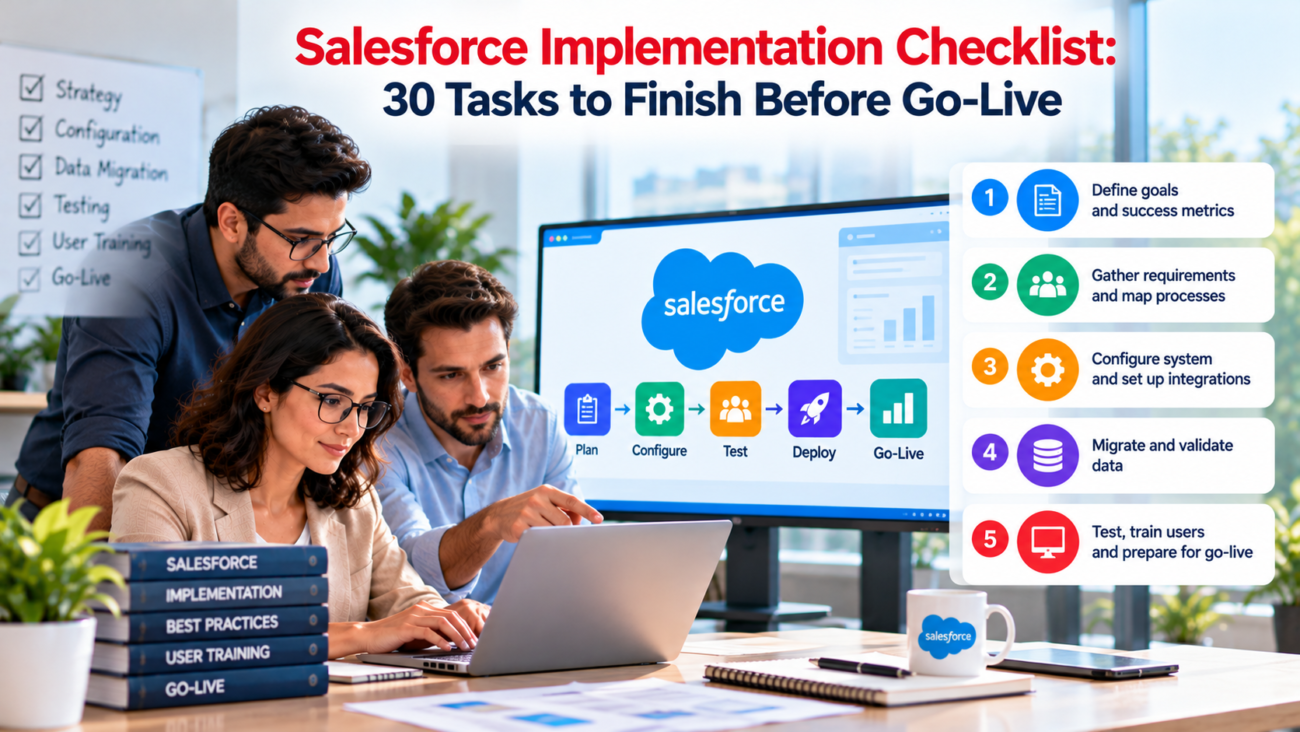
This Salesforce implementation checklist covers 30 tasks to close before production use begins. Each task has a practical test or decision so that an owner can mark it complete with evidence. It works for a first CRM rollout or a major rebuild of an existing org. Adapt the details to your Salesforce products and your business, but don’t skip a task merely because the screen looks ready.
TL;DR
Before Salesforce goes live, approve the scope and decision owners, verify licenses and security, clean and reconcile migrated records, test connected systems, and prove that automation and reports behave as expected. Run user acceptance testing with staff performing their normal jobs. Rehearse the production release, check that backups can be restored, and prepare training and support. Treat launch approval as a business decision backed by test results. A green deployment message means the changes were applied; it doesn’t prove that people can work safely in the new system.
Set the Go-Live Rules and Owners
A Salesforce go-live checklist needs a clear definition of finished. Without one, teams confuse a completed configuration with a usable system. Use the Salesforce implementation checklist to settle these 3 decisions before technical review. They define who can accept a risk and who can stop the launch.
Task 1: Freeze the Launch Scope
Write down what must work on day 1 and what can wait. Include the objects, customer journeys, integrations, reports, and user groups in the release. Separate mandatory functions from later improvements.
An effective Salesforce implementation checklist still allows fixes for launch-blocking defects after scope freeze. It simply requires someone to review their effect on testing and timing. For example, adding a new lead field late in the project might affect validation rules, import files, forms, and reports. The output is a dated scope list with an owner for every required function.
Task 2: Name the Final Decision-Makers
Assign one person to coordinate the release and separate approvers for business processes, data, security, and technical deployment. A project manager can collect results but shouldn’t approve financial totals on behalf of finance. Likewise, a developer shouldn’t decide whether a support agent can work around a missing customer-history field.
Create a short sign-off record with each area, its owner, the evidence required, and the latest decision time. Document who can pause the release when a serious fault appears. This prevents a go-live meeting from turning into an argument about who has authority to accept a known problem.
Task 3: Set Pass and Fail Conditions
Define what qualifies as a blocker. Examples include users seeing records outside their role, lost customer data, incorrect financial totals, failed order handoffs, or a broken path for creating cases.
For each critical workflow, set a measurable result before testing starts. Use the Salesforce implementation checklist to keep those results in one place. “Create a lead, convert it, and find the related account and opportunity” is better than “lead process works.” Salesforce’s deployment guidance favors controlled releases and testing outside production, which supports a written acceptance gate. Record the pass criteria in a shared register and require proof rather than verbal reassurance.
Confirm Identity, Permissions, and Record Access
Here, the Salesforce implementation checklist focuses on what each person is allowed to do, which data that person can see, and whether sign-in protection is active. Test with ordinary user accounts, not only an administrator account.
Task 4: Verify Licenses and User Provisioning
Match your launch roster to purchased and available licenses. Identify staff who need Sales Cloud, Service Cloud, platform access, or a separate product license. Check active users, usernames, email addresses, locale settings, and any single sign-on assignments.
Provision representative users early enough to test them. Confirm that their home pages, apps, and record types match the job. The roster should show that every employee has a valid access route and the correct product rights.
Task 5: Test Least-Privilege Permissions
Build access around work people perform. A sales representative may need to edit owned opportunities but shouldn’t gain permission to change security settings. Test create, read, edit, and delete permissions along with field-level controls and record sharing.
To prevent overly broad access before launch, Salesforce’s permission set guidance recommends a minimum-access base with permission sets for job duties. Use that model where it fits, then sign in as test users to verify actual behavior. Include 1 negative test per role: the user must be unable to perform a restricted action. Approve access only when both permitted and blocked actions behave correctly.
Task 6: Prove MFA and Account Recovery
Confirm the sign-in method for direct Salesforce logins and single sign-on. Test multi-factor authentication (MFA) for employees, including administrators and remote workers. Salesforce’s MFA requirements state that enforcement began in June 2026 for employee logins in active production orgs and sandboxes. A training session won’t fix an identity setup that blocks users on launch day.
Also test a lost-phone or changed-device scenario. Identify who can help someone regain access and how identity is verified before a reset. Sign-off requires a successful normal login and a documented recovery path, not a promise that IT will handle it.
Prepare the Source Data for Conversion
The Salesforce data migration checklist begins before the import tool opens. Data owners need to decide what counts as a valid customer record and which source wins when systems disagree.
Task 7: Inventory Every Source and Field
List the spreadsheets, old CRM tables, marketing tools, service systems, and finance exports supplying launch data. Identify the owner of each source, the latest export time, and which fields will be moved.
Build a field map showing source names, Salesforce destinations, data types, required fields, picklist values, and conversion rules. Record what happens to blank values and unsupported formats. A legacy “status” column might contain dozens of variants that must map to 5 agreed stages. The Salesforce data migration checklist needs a mapping sheet approved by data owners, with every required source accounted for.
Task 8: Clean Duplicates and Invalid Values
Resolve obvious duplicate accounts and contacts in the source. Standardize country names, phone formats, required addresses, and picklist values. Don’t assume that matching on email alone identifies a unique person; shared inboxes and changed addresses make that unsafe.
To reduce errors in the initial load, Salesforce’s data import instructions advise cleaning blanks, duplicates, and inconsistent formats before loading. Review duplicate rules in the target org as well, because they may block legitimate records or permit unwanted copies. Sign off on exceptions that remain and identify who will resolve them after launch.
Task 9: Approve Mapping and Retention Rules
Decide which records should remain live, which belong in an archive, and which shouldn’t be moved. Old test leads and closed records may not need the same treatment as open opportunities or active cases.
For each object, agree on required history, ownership rules, related records, and how deleted or merged records will be handled. Include attachments and notes when they matter to the user journey. The Salesforce data migration checklist is complete at this stage only when business owners can explain how a source record will appear in Salesforce and why any information was excluded.
Rehearse and Reconcile the Data Load
Cleaning and mapping answer what should move. The next 3 Salesforce data migration checklist tasks prove that the move works. A Salesforce data migration checklist needs evidence from a test load, including rejected rows and relationship checks. Don’t mistake a successful job status for accurate business data.
Task 10: Run a Trial Load in the Right Order
Import a representative sample into a suitable nonproduction environment. Load parent records before their children, and check links between accounts, contacts, opportunities, cases, and custom objects. Use stable external identifiers where appropriate so repeat loads can update known records rather than create copies.
For import order and related record links, Salesforce’s migration instructions describe import sequencing and the use of external IDs to preserve relationships. Rerun the load after fixing errors to see whether the method handles retries safely. A trial passes when records and links can be recreated consistently.
Task 11: Reconcile Counts and Business Values
Compare source and destination counts by object, status, and owner. Then test measures that matter to the business: open pipeline by stage, overdue cases, contract amounts, and the number of active customer accounts.
The Salesforce implementation checklist should name the source snapshot, query filters, target results, expected differences, and the person approving the numbers. Investigate large or unexplained differences before proceeding. The final production load must repeat this check using the actual cutover snapshot, because passing an earlier rehearsal doesn’t validate later changes.
Task 12: Handle Failures and Final Data Changes
Prepare for rows that fail validation, hit duplicate rules, or reference missing parents. Identify the error owner and decide when to fix a source file versus a target rule. Salesforce’s duplicate import article explains how matching and duplicate rules can reject imports. Review each rejected category instead of turning protections off without a reason.
Decide when users stop updating the old system and how changes made after the initial export will reach Salesforce. If there is a delta load, test it with modified and newly created records. The Salesforce data migration checklist ends with a reconciled final load, with material failures fixed and remaining exceptions explicitly accepted.
Check Every Connected System
A Salesforce go-live checklist must account for failures outside Salesforce, even when everything inside looks normal. The Salesforce go-live checklist must cover the route each customer record takes through connected tools. Test both directions when information travels in and out, and include failures instead of relying on a single successful transfer.
Task 13: List Integration Owners and Data Flows
Document every active connection: website forms, marketing platforms, ERP, billing, telephony, support inboxes, identity services, and any data warehouse. For each connection, name the source of truth, trigger, transferred fields, expected timing, and owner on both sides.
A simple flow diagram helps find hidden dependencies. If an order starts on a website, reaches Salesforce, and then goes to finance, identify what happens if finance rejects it. Who retries the transfer? Which record holds the error? What prevents duplicate orders after a retry? Sign off when each integration has a tested happy path and a person responsible for failures.
Related reading: Salesforce Nonprofit Cloud vs. NPSP: Should You Migrate Now
Task 14: Validate Credentials and Production Endpoints
Confirm that integrations use approved production endpoints and service identities. Check authentication scopes, certificates or tokens, network rules, and connected app access. A connection that worked in a sandbox can fail after launch because its callback URL, permissions, or secret is different. Don’t paste production credentials into test documents or leave them in personal user accounts.
For outbound connections that need authentication, Salesforce’s credential configuration guide explains how named and external credentials support authenticated callouts. Use those controls where they fit your design. Ask integration owners to demonstrate a production-ready connection without exposing secrets, and record the renewal owner for any expiring certificate or token.
Task 15: Test Failures, Retries, and Monitoring
Send a duplicate message, omit a required value, and simulate an unavailable destination in a controlled test. Verify whether the integration retries, queues the message, or alerts an operator. Look at logs from both systems and check that timestamps and record identifiers make the failure traceable.
When a connection fails with an unusual response, the Salesforce credential troubleshooting notes describe authentication failures that can produce unexpected response codes. Don’t assume every access problem returns a neat unauthorized message. The integration passes when the normal transfer works and the team can detect, explain, and safely recover from a failed one.
Prove Automation and Business Rules
The Salesforce implementation checklist also covers automatic actions that users may never see. Flows, Apex, validation rules, approvals, and assignment logic can change data or send messages without a person pressing a button. Verify when each should run and what should happen when it cannot finish.
Task 16: Inventory Active Automation
Build one inventory of the automation that will run at launch. Include record-triggered and scheduled Flows, Apex triggers, approval rules, assignment rules, and external jobs that update Salesforce. Flag rules that do the same job or may conflict with each other.
Pay attention to sequence. Creating an opportunity may launch an assignment action, notify a manager, and update a forecast field. If one action overwrites another, the final value may be wrong even though neither tool shows a clear error. The pass condition is a reviewed inventory with duplicate behavior resolved and unused rules disabled through the approved release process.
Task 17: Test Positive and Negative Paths
Write tests for normal activity and realistic exceptions. For a lead handoff, try a complete lead, one with a missing required value, one matching an existing contact, and one that shouldn’t qualify. Check records created, ownership, notifications, and downstream steps. Don’t settle for a Flow debug session that shows only the expected route.
To check a Flow again after changes, Salesforce’s Flow test lesson describes automated tests and assertions for record-triggered Flows. Combine those checks with broader end-to-end tests where multiple systems are involved. Save the input and expected outcome for each test. The automation is ready when both success and failure behavior agree with the approved process.
Task 18: Control Side Effects at Cutover
A final data load can trigger automation that sends emails, creates duplicate tasks, or pushes old records into connected systems. Review what runs on insert and update before importing production data. Decide which actions should be paused, which must remain active, and how normal behavior will be restored. Record each change with a named owner.
Test the load procedure using the same automation settings planned for launch. If a rule must be turned off temporarily, record its prior state and the exact step that turns it back on. After cutover, run a small controlled transaction to confirm ordinary automation has resumed. The Salesforce deployment plan should never depend on someone remembering to reenable a rule from memory.
Validate Reports and Management Decisions
A Salesforce implementation checklist must guard against reports that open but tell the wrong story. The Salesforce go-live checklist must verify the numbers that managers and teams will act on. Keep report acceptance separate from data import reconciliation: the data can be correct while the report’s filters or calculations are wrong.
Task 19: Agree on KPI Definitions
Define the key measures before comparing dashboards. For sales teams, state what counts as an active opportunity, how stage values are grouped, and which date controls the forecast. For service teams, define first response, backlog, and resolution in terms staff already use.
Record report owners, filters, and sources in a small metric dictionary. The definition should be readable by a manager without knowing Salesforce formulas. When a dashboard differs from an old spreadsheet, this record helps determine whether the difference is a data problem or a changed business rule. A KPI is accepted when its owner approves both the definition and the result.
Task 20: Rebuild and Reconcile Critical Reports
Choose the reports used in revenue reviews, weekly service meetings, and compliance checks. Compare their totals against a trusted source using the same cutoff date. Check grouping, currency handling, report types, formula fields, and whether the dashboard has refreshed. Drill into a sample of records behind each total rather than comparing headline numbers alone.
To check who can see a dashboard’s data, Salesforce’s reporting overview explains folder access and how the running user can affect dashboard data. Check those settings before signing off. A finance dashboard might be accurate for an admin yet incomplete for a manager. Save the expected and actual values, with a note explaining each accepted difference.
Task 21: Test Report Access and Subscriptions
Open key reports as the people who will use them. Verify that private customer details aren’t exposed through shared folders, exported files, or dashboard viewing rights. Check that sales managers can see the correct teams and that frontline staff see the right scope. If your business uses scheduled emails or dashboard subscriptions, test recipients and delivery.
Also check that reports are easy to locate. A Salesforce implementation checklist should cover whether users can find reports. A correct dashboard hidden in the wrong folder won’t help during a busy morning. Approval comes from the report owner after access and delivery are tested, not from the developer who created the chart.
Run User Acceptance Testing With Real Work
Salesforce UAT testing is where the people who do the work decide whether the system is ready. Technical checks support their decision but can’t replace it. Give testers realistic records, ordinary permissions, and enough time to finish tasks without coaching.
Task 22: Write Scenarios From Actual Jobs
Ask each department for the work it must finish in Salesforce during a normal day. A rep should qualify a lead and move a deal forward. A service agent should receive a case, record a response, and close it. A manager should find an overdue item and assign follow-up. Include mobile work if employees depend on it.
Use brief scripts stating the starting record, steps, expected result, and severity if they fail. Include edge cases such as reassigned ownership or an account with many related contacts. Salesforce’s rollout advice calls for retesting after changes move to production, which matters even after sandbox acceptance.
Task 23: Record Evidence and Triage Defects
Provide testers with one place to record outcomes. Each failure should identify the user role, test scenario, record ID when safe to share, steps to repeat, expected result, and actual result. Screenshots may help, but don’t put customer secrets or credentials into an open defect tracker.
For Salesforce UAT testing, hold short triage sessions with business and technical owners. Classify each defect using the pass and fail rules approved earlier. A confusing button label may need a quick fix; a record-access breach should stop release approval until resolved. Salesforce UAT testing succeeds when every critical scenario passes and each remaining defect has a documented decision and owner.
Task 24: Retest Fixes and Obtain Business Sign-Off
During Salesforce UAT testing, ask the original tester to rerun each fixed scenario. Then test nearby work that the fix may affect. A change to opportunity validation could repair one save error and unexpectedly block a different sales process. Record the release version used for the successful retest so evidence isn’t tied to outdated code.
Team leads should confirm they can perform their work, while IT confirms the configuration and integrations are fit for release. No single success email should stand in for all departments. Finish Salesforce UAT testing with signed decisions, an accepted-defect list, and evidence that the tested build matches the intended release.
Rehearse the Production Release
A Salesforce deployment plan needs the exact sequence, not merely the date. Show what moves, who handles it, what must be checked, and when the release can still be stopped.
Task 25: Confirm the Deployment Package and Dependencies
The Salesforce deployment plan must list the metadata to deploy, including objects, fields, permission sets, pages, Flows, Apex, report types, and integration settings. Compare the release package with what was tested and identify manual steps that a deployment tool won’t perform. Keep the source version or change record that produced the package.
When preparing the sandbox release package, Salesforce’s change set practices emphasize dependent components and validating changes before deployment. Remember that a change set carries configuration, not customer records. Build separate instructions for metadata, data loading, and target-specific settings. The release is ready when another qualified administrator can follow the documented package without guessing what was omitted.
Task 26: Run a Timed Cutover Rehearsal
Walk through the release from the first announcement to the final smoke test. Include any old-system freeze, exports, backup checks, deployments, data loads, identity changes, integration switches, and validation jobs. Assign one person to track completion and one owner per step. Record actual durations instead of assuming that every import and test will finish instantly.
If a trial takes longer than the available maintenance window, change the plan rather than expecting production to be faster. The Salesforce deployment plan should identify dependencies and a clear stop point before customer-facing work resumes. Use the Salesforce deployment plan to tell affected teams what service interruption to expect and what they should do.
Task 27: Verify Backups and Recovery Decisions
Take an approved backup or export before risky production changes. Check what it includes: records, relationships, files, and relevant configuration. A CSV export doesn’t capture every part of an org’s setup. Salesforce’s backup best practices distinguish data from metadata and explain why both require attention. Check the chosen backup method against the actual recovery need.
Assign a person to decide whether the team stops, fixes forward, or restores a prior state. Restoring data can be complex once new records have been created, so a backup isn’t an instant undo button. Test access to the backup and document how key relationships would be rebuilt. The release gate is proof that recovery files exist and the team understands their limits.
Prepare Users and the First Days of Support
The final Salesforce implementation checklist phase concerns people who need to work after the project team leaves. Training must match the released screens. Support should catch problems before teams build workarounds in spreadsheets or send private customer data through email.
Task 28: Train People on Their Own Workflows
Give each group a short session based on its actual tasks. Sales staff need to know how to update deals and find follow-up work; service staff need the right case steps. Use the production-ready layouts in a safe training environment and include ordinary mistakes, such as selecting the wrong account or correcting an incorrect field.
Provide searchable job aids with screenshots that match the final build. Check comprehension with small exercises, not only attendance. A user who can follow a trainer but can’t complete the process alone needs more practice. Training passes when representative users can finish their core tasks without step-by-step help.
Task 29: Set Up a Launch Support Process
Choose where users report problems, the hours support is available, and who handles urgent issues. Prepare categories for login trouble, missing records, wrong permissions, broken automation, integration failures, and reporting disputes. Give each case a severity, owner, and expected next response. Don’t route every concern to one administrator without backup.
Arrange short check-ins during the first days of use. Publish known issues and safe temporary steps, if any. Define the handoff from project support to the permanent Salesforce owner. The launch support process is ready when a test ticket travels from report to resolution and the user receives a response.
Task 30: Set the Adoption and Stability Measures
Choose a few signals that will show whether launch is holding up: successful logins, required records created, failed integrations, unresolved severe tickets, and completion of core tasks. Set a review schedule and capture a baseline when possible.
For a review that continues beyond launch week, Salesforce’s adoption metrics lesson ties use of the system to business results and user feedback. Pair activity measures with conversations about friction. Name the person who will review trends and approve fixes after release. The Salesforce go-live checklist ends with an agreed owner for the live service, not with the project team’s final meeting.
Task 31: HyphenX
HyphenX is a Salesforce consulting partner that can help you put this into practice if you need hands-on support.
Make the Final Go-Live Decision
The 30 tasks should produce a short record of what was tested, who approved it, and what remains open. Use a launch gate that leaders can read without combing through 30 separate project threads. The most useful summary has a status for each workstream, a link to its evidence, a named approver, and a decision on unresolved risk.
| Launch Gate | Evidence Required | Who Approves |
| Business readiness | Core scenarios pass; accepted defects listed | Department leads |
| Data readiness | Final load reconciled; exceptions explained | Data owners and finance |
| Security readiness | Login, MFA, and restricted access tested | Security or IT owner |
| Technical readiness | Integrations, automation, and release checks pass | Technical lead |
| People readiness | Training finished; support process tested | Operations lead |
A green decision means required checks passed and known exceptions were accepted by the people accountable for the impact. A yellow decision means named issues remain but have safe handling and deadlines. Red means a launch blocker remains unresolved. Don’t let the calendar turn a red item green.
Use this Salesforce implementation checklist as a decision record as much as a work list. A checked release protects customer records and gives staff a realistic chance to work from day 1. After launch, keep checking adoption and failures until the normal support team can run Salesforce without special project help.
FAQs
What Is a Salesforce Implementation Checklist?
A Salesforce implementation checklist is a set of tasks and acceptance tests used to confirm that a CRM setup is ready for daily use. It covers the release scope, security, data, integrations, reports, testing, deployment, and user support. Each task should have an owner and evidence of completion.
When Should Teams Start a Salesforce Go-Live Checklist?
Start the Salesforce go-live checklist while the implementation is being built. That gives enough time to define pass criteria, assign owners, and gather test data. Waiting until the last week can uncover issues that need a longer fix or another round of user testing.
Related reading: Sales Cloud vs. Service Cloud: Which License Do Your Teams Actually Need
Who Signs Off on Salesforce Go-Live?
Business owners should approve the work their teams must complete. Data owners approve migrated records, security staff approve access, and technical leads approve the release. A named sponsor or release authority then makes the final decision using those sign-offs and the accepted-risk list.
Is User Acceptance Testing Required Before Launch?
Salesforce UAT testing is a strong business control even when no formal rule requires it. It lets frontline staff test common tasks under real permissions. For a significant deployment, skipping this step means the people who depend on Salesforce haven’t confirmed that it supports their work.
What Data Should Be Migrated First?
Parent records typically move before related child records. For example, accounts are commonly loaded before contacts and opportunities that refer to them. The exact order depends on your data model. Test the sequence with external identifiers and verify the resulting relationships.
How Do We Know a Data Migration Succeeded?
Use the Salesforce data migration checklist to compare record counts, business totals, owners, and parent-child links against a known source snapshot. Investigate rejected rows and unexpected differences. A completed import job isn’t sufficient proof that the migrated data is correct.
Should We Turn Off Duplicate Rules During Import?
Only when the data owner and administrator have approved a controlled exception. Duplicate rules may block valid loads, but switching them off can also create duplicate customers. Test matching logic first, record any temporary change, and restore protection according to the cutover plan.
How Do We Test Integrations Before Go-Live?
Run representative transactions across each connection and confirm the outcome in both systems. Include missing fields, duplicates, failed authentication, and unavailable endpoints. Document where errors appear, who receives alerts, and how a failed transaction can be retried without creating another record.
What Is the Difference Between UAT and Regression Testing?
Salesforce UAT testing checks whether users can complete business work as expected. Regression testing checks whether a change broke functions that previously worked. Both are needed after significant fixes because a process can pass its own test while disrupting a related process.
What Should a Salesforce Deployment Plan Include?
A Salesforce deployment plan should state the release sequence, responsible people, data freeze time, deployment method, test steps, communication plan, and stopping conditions. It should also explain how to handle failed checks and when users are allowed back into the system.
Can Change Sets Move Customer Records Into Production?
No. Change sets are for supported configuration and metadata changes between related Salesforce orgs. Customer records need a separate import or migration method. Test both parts and include their order in the cutover instructions so the final configuration and data work together.
Do We Need a Backup Before Salesforce Go-Live?
Yes, take and verify an appropriate backup before risky production changes. The exact method depends on what may need recovery. Records, files, and metadata have different needs. A backup should come with a recovery owner and a realistic plan for handling new changes made after launch.
How Long Should Salesforce Go-Live Support Last?
Set the support period based on risk and the time needed to complete key business cycles. A team may need coverage through its first billing run, forecast review, or service reporting period. Extend focused support if critical errors remain, then hand routine issues to the permanent admin team.
What Are Common Salesforce Go-Live Blockers?
Typical blockers include missing customer records, exposure of restricted data, failed employee logins, broken billing transfers, and severe automation errors. Agree on these rules before launch. An issue is a blocker when its business impact exceeds the risk the responsible owner is authorized to accept.
How Do We Measure Success After Salesforce Goes Live?
Track whether staff complete core work, whether important records are correct, and whether integrations and reports remain reliable. Review incident trends and ask users where tasks take too long. Compare outcomes with the goals set before launch rather than relying on login counts alone.
